Step-by-Step Guide to Making a Fiber Laser Welder

You can build a fiber laser welding machine at home, even if you have never tried before. Taking the DIY approach lets you customize your laser welding machine and save money. The Pendstar Laser DIY Fiber Laser Welding Machine gives you flexible options, including water-cooled or air-cooled setups. You will use a high-quality laser source, a precise laser head, a reliable control system, and a dependable laser chiller. With the right parts and guidance, you can achieve strong, accurate welds for many projects.
Key Takeaways
- Building a fiber laser welding machine at home is possible with the right components and guidance. Customize your setup to fit your needs and save money.
- Key components include a reliable laser source, a cooling system, control electronics, and a sturdy frame. Each part is crucial for safety and performance.
- Choose between water-cooled and air-cooled systems based on your welding needs. Water cooling is best for high-power tasks, while air cooling is simpler and more portable.
- Always prioritize safety by wearing protective gear and following strict safety procedures. Regular inspections and maintenance help prevent accidents.
- Testing and calibration are essential for optimal performance. Use the right tools and follow proper steps to ensure your machine delivers precise results.
Fiber Laser Welding Machine Essentials
Key Components Overview
To build a reliable fiber laser welding machine, you need to understand the main components and their functions. Each part plays a critical role in the welding process, and choosing the right options ensures both safety and performance. Pendstar Laser’s DIY Fiber Laser Welding Machine offers a complete set of high-quality components, making assembly straightforward for beginners and experienced users alike.
Here is a comparison of commonly used components in fiber laser welding machines:
| Component Type | Key Features | Performance Characteristics |
|---|---|---|
| Handheld Fiber Laser Welding | 800W to 3000W models, lightweight, user-friendly interface | Welds up to 8mm thickness, works with many materials, reliable performance |
| Industrial Fiber Laser Welding | 1500W to 6000W power options, adjustable power range | Smooth welds, minimal distortion, ideal for stainless and carbon steel |
| Jewelry Laser Welding Machines | Auto eye protection, precise energy and pulse width adjustments | Continuous operation, compact, perfect for detailed work |
| Advanced Beam Delivery Optics | Simplifies operation, enables closed seam welding | High output, consistent weld quality, great for complex seams |
| ExactWeld 410 Micro Laser System | CNC motion, SmartWeld™ technology | Bridges wider gaps, supports complex seams, high positioning accuracy |
When you select your fiber laser welding machine components, focus on these essentials:
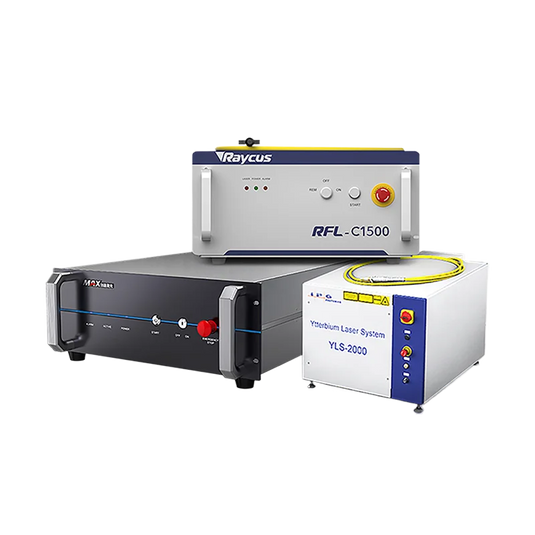
- Laser Source: This is the heart of your machine. It generates the laser beam used for welding. Pendstar Laser provides reliable sources for different power needs.
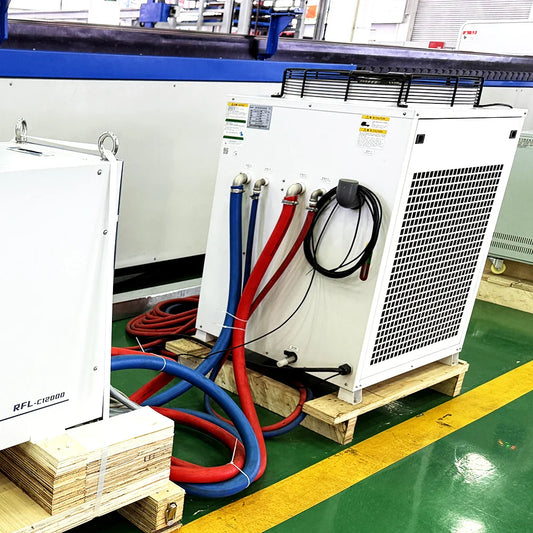
- Cooling System: You can choose between water-cooled and air-cooled systems. Water cooling offers superior efficiency and keeps the temperature stable during long welding sessions. Air cooling is simpler and works well for lighter tasks.
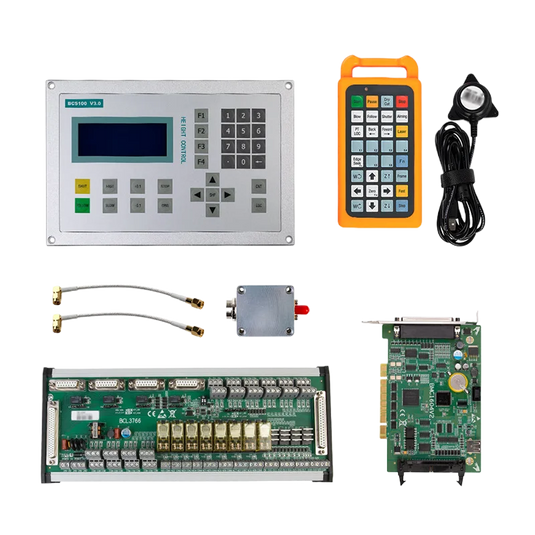
- Control Electronics: These manage the laser’s power, safety features, and welding parameters. A user-friendly interface helps you adjust settings quickly.
- Machine Cover and Frame: The cover protects internal parts from dust and damage. A sturdy frame ensures stability during operation.
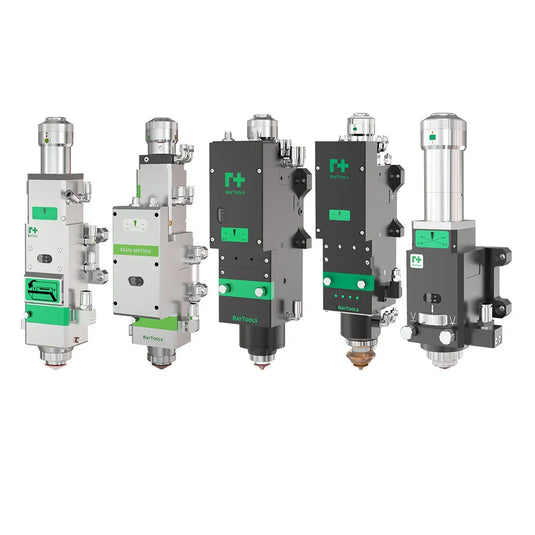
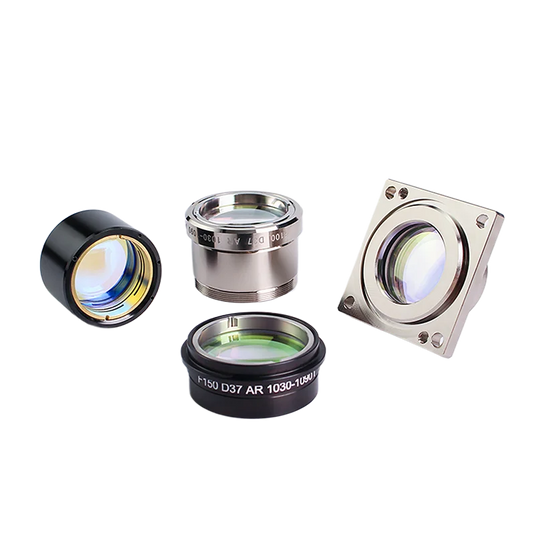
- Beam Delivery System: This includes fiber optics cables, collimators, and focusing lenses. These parts guide and focus the laser beam onto the workpiece.
- Wire Feeder and Shield Gas System: The wire feeder adds filler material for certain welds. Shield gas prevents oxidation and improves weld quality.
- Fume Extraction Unit: This removes harmful fumes and keeps your workspace safe.
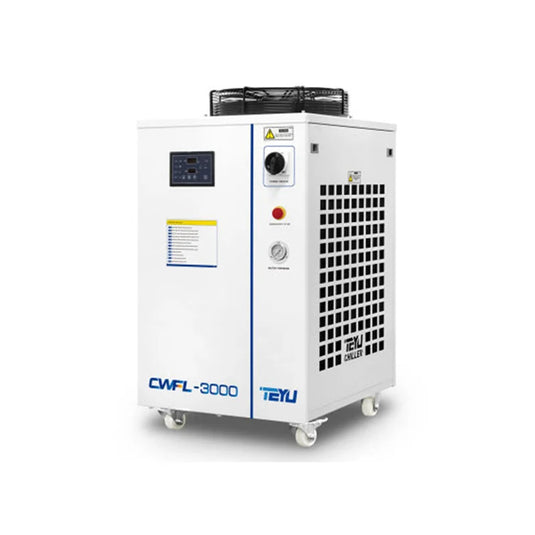
- Chiller: For water-cooled systems, a chiller maintains the right temperature and prevents overheating.
Tip: Water cooling systems provide better temperature control and reduce thermal stress on your machine. They are ideal for high-power or continuous welding tasks.
Tools Checklist
You need the right tools and consumables to assemble and operate your fiber laser welding machine safely and efficiently. Here is a checklist to help you get started:
- Power Supply: Converts electrical current for the laser’s pump source.
- Laser Source: Includes the pump, gain medium, and laser cavity.
- Fiber Optics Cable: Directs the laser beam to the welding area.
- Fiber Collimator and Beam Expander: Focus and expand the laser beam for precise welding.
- Scanning Head and Focusing Lens: Control and focus the beam on your workpiece.
- Focus Shifter: Adjusts the focal distance for different material thicknesses.
- Wire Feeder: Adds filler material during welding.
- Shield Gas Supply: Protects the weld from oxidation.
- Laser Controller: Lets you set and monitor welding parameters.
- Fume Extraction Unit: Removes toxic fumes from the workspace.
- Laser Weld Monitor: Provides real-time feedback on weld quality.
- Chiller: Keeps the laser at the right temperature during operation.
You also need protective gear to keep yourself safe:
| Protective Gear | Description |
|---|---|
| Laser Protective Glasses | Protect your eyes from laser light. |
| Welding Mask | Shields your face and neck from radiation and spatter. |
| Heat-Resistant Gloves | Prevent burns and accidental exposure to the laser. |
| Flame-Resistant Clothing | Guards against heat and flames. |
| Safety Footwear | Prevents injuries from heavy objects. |
| Respirators | Protects you from fumes and hazardous gases. |
Note: Always wear laser safety glasses rated for your machine’s wavelength. Use flame-resistant clothing and gloves to prevent burns. Proper safety gear is essential for every step of assembly and operation.
You may also need calibration accessories, such as alignment tools and test plates, to ensure your fiber laser welding machine works accurately. Pendstar Laser includes a comprehensive assembly checklist and offers technical support to help you with each step.
By gathering these components and tools, you set yourself up for a smooth and safe assembly process. You can now move on to building your fiber laser welding machine with confidence.
Assembly Steps

Workspace Preparation
You need a safe and organized workspace before you start building your fiber laser welding machine. Choose a well-ventilated area with enough room for all components and tools. Make sure the environment is clean to prevent dust and debris from affecting the assembly. Use enclosures made from durable materials to protect yourself and the machine. Install a fume extraction system with HEPA filters to remove harmful gases and particulates. Good ventilation helps control heat buildup and keeps the air fresh. Cooling systems in the workspace help maintain optimal temperatures during welding.
Tip: Always keep your workspace tidy and free from clutter. This reduces the risk of accidents and makes assembly easier.
Frame and Cover Setup
Begin by assembling the frame. Use the assembly checklist from Pendstar Laser to ensure you have all the necessary parts. Secure the frame on a stable surface. Attach the machine cover to protect internal components from dust and accidental contact. Make sure the cover fits tightly and leaves no gaps. The enclosure should withstand the conditions of laser welding and provide a barrier against stray laser beams.
Laser Source Installation
Install the laser source according to the instructions provided by Pendstar Laser. Place the source in the designated area inside the frame. Connect the fiber optics cable to the laser source. Align the cable carefully to avoid bending or damage. Secure the laser source with mounting brackets. Double-check all connections to ensure stability. The laser source is the heart of your fiber laser welding machine, so handle it with care.
Power and Control Integration
Connect the power supply to the laser source. Use the recommended wiring practices to ensure safety and reliability. Refer to the table below for compatible control systems with Pendstar Laser’s machines:
| Feature | Description |
|---|---|
| Control Card Interface | Network cable interface with PCI connection |
| Supported Laser Types | CW, QCW, and semiconductor lasers |
| Motion Control | 4 Axis linkage control with high precision |
| Processing Modes | Supports processing, idling, and dotting modes |
| File Support | DXF, WTF, NC, TXT, PLT, etc. |
| CAD Engine | Advanced CAD drawing engine for graphics editing |
| Installation | Simple installation with guide rail and pluggable ports |
Install the control electronics and connect them to the laser source and power supply. Make sure all cables are properly insulated. Use pluggable ports for easy setup. Test the control system to confirm it responds to commands.
Cooling System Options
Select the cooling system that fits your needs. Water-cooled systems work best for high-power and continuous welding. They offer superior cooling efficiency and better temperature control, which is crucial for precision tasks. Air-cooled systems are simpler, more portable, and cost less. They suit lighter applications like engraving and small-scale cutting.
| Feature | Water-Cooled | Air-Cooled |
|---|---|---|
| Cooling Efficiency | High | Efficient for most tasks |
| Portability | Low | High |
| Maintenance Costs | High | Low |
| Initial Cost | More expensive | Affordable |
| Noise Level | Low | Moderate to High |
| Ideal Usage | High-power, continuous | Portable, low-medium power |
Consider these factors when choosing a cooling system:
| Factor | Air-Cooled Systems | Water-Cooled Systems |
|---|---|---|
| Operating Costs | Lower upfront and maintenance costs; suitable for lower-power machines. | Higher initial investment; more complex maintenance but can lower overall costs over time. |
| Space Requirements | Simpler design, more portable, suitable for tight spaces. | Requires more space due to complex piping and coolant systems. |
| Temperature Control | Less effective in maintaining stable temperatures, especially in high ambient heat. | Excellent at maintaining steady temperatures, crucial for precision welding. |
| Impact on Welding Quality | Can lead to overheating and inconsistent weld quality during high-power use. | Reduces heat stress on components, improving weld quality and consistency. |
Note: If you plan to weld thick materials or run your fiber laser welding machine for long periods, choose a water-cooled system. For small projects or portable use, air-cooled systems work well.
Wiring and Safety Checks
Follow safe wiring practices to protect yourself and your equipment. Use stable voltage and current output. Avoid sharing power lines with other high-power devices. Ground all connections to reduce the risk of electric shock. Check insulation on all electrical equipment and replace damaged parts. Install overload and short circuit protection devices. Inspect wiring regularly and keep records of maintenance.
| Safety Practice | Description |
|---|---|
| Power supply and stability | Ensure stable voltage and current output; avoid sharing power lines with high-power equipment. |
| Ground connection and grounding | Proper grounding to quickly discharge current in case of faults, reducing electric shock risks. |
| Electrical Equipment Insulation | Regular checks on insulation to prevent leakage and electric shock; repair or replace damaged parts. |
| Overload and short circuit protection | Equip with devices to cut off power during overloads or short circuits to protect equipment. |
| Regular inspection and maintenance | Conduct regular inspections to identify faults; maintain records for analysis. |
| Operating procedures and safety training | Provide training on operation and emergency procedures to minimize risks. |
Before you power on your fiber laser welding machine, perform these safety checks:
- Clean the environment to prevent hazards.
- Inspect all equipment thoroughly.
- Train operators on safe handling.
- Wear laser safety goggles and protective clothing.
- Use laser welding curtains or enclosures.
- Ensure proper ventilation to disperse fumes and smoke.
Alert: Never skip safety checks. Proper safety measures protect you and extend the life of your machine.
You have now completed the main assembly steps. Pendstar Laser’s assembly checklist and support resources can help you with any questions during the process. You are ready to move on to testing and calibration.
Testing and Calibration

Initial Power-Up
You need to follow a careful sequence when powering up your fiber laser welding machine for the first time. This process helps you avoid damage and ensures safe operation. Here are the standard steps:
1. Select the right materials for welding, such as metals, plastics, or ceramics.
2. Perform a safety check:
- Confirm all power cables are connected correctly.
- Make sure the inert gas supply is sufficient and the pipeline is intact.
- Inspect the waterway pipeline for leaks or blockages.
- Check that the laser circuit breaker is switched on.
3. Start the machine:
- Turn on the main power switch.
- Release the emergency stop button.
- Start the chiller and inspect for leaks.
- Activate the laser after the chiller temperature reaches above 19℃.
- Attach the safe wire clip to the welding plate.
Tip: Always double-check safety steps before activating the laser. This protects you and your equipment.
Calibration Process
Proper calibration ensures your fiber laser welding machine delivers precise results. You can use different tools depending on your needs and budget:
| Tier | Budget (Approx.) | Core Tools | Application & Capability |
|---|---|---|---|
| Entry-Level | < $150 USD | Allen key set, lens paper, alcohol, tape, flashlight | Daily checks & basic calibration |
| Professional | $150–$3,000 USD | Laser power meter, IR viewer card, alignment targets | In-depth diagnosis & precision repair |
| Master-Class | > $3,000 USD | Beam analyzer, automated alignment, interferometer | R&D, high-precision manufacturing |
To align the laser head, follow these steps:
- Remove the nozzle and focusing lens cartridge.
- Place adhesive tape across the lower opening of the cutting head.
- Fire a single pulse to mark the tape.
- Adjust the collimator screws to center the mark.
- Repeat until the burn mark is perfectly centered.
Note: Clean optics and precise alignment improve weld quality and machine safety.
Performance Check
After calibration, you need to test the machine’s performance. Evaluate these key metrics:
| Performance Metric | Description |
|---|---|
| Laser Output Power Test | Measures stability and accuracy of laser power. |
| Beam Quality Analysis | Checks beam focus and intensity distribution. |
| Welding Speed and Penetration Test | Assesses speed and depth on test specimens. |
| Weld Quality Inspection | Uses visual and non-destructive methods to find defects. |
| Repeatability and Stability Test | Confirms consistent results over multiple welds. |
🛠️ Consistent performance means your fiber laser welding machine is ready for real projects.
Troubleshooting and Safety
Common Issues and Fixes
You may encounter several operational challenges when using your fiber laser welding machine. Understanding these problems helps you maintain high weld quality and avoid downtime. The table below lists frequent issues, reasons, and practical solutions:
| Issue | Reason | Solution |
|---|---|---|
| Slag splashing | Excessive power or unclean surface | Adjust power, clean surface, reduce gas pressure |
| Weld seam too high | Fast wire feeding or slow welding speed | Reduce wire feeding speed, increase welding speed |
| Welding offset | Inaccurate positioning | Adjust laser offset, check wire feeder alignment |
| Dark weld color | Low laser power or fast welding speed | Adjust laser power and welding speed |
| Uneven weld at corners | Incorrect welding posture | Adjust focus offset for sideways welding |
| Depression at weld | High laser power or incorrect focus | Adjust laser power and focus |
| Uneven weld thickness | Laser or wire feeder instability | Check stability of laser and wire feeder systems |
| Undercut | Fast welding speed or large gaps | Adjust power and speed, perform filling or repair |
Tip: Regularly inspect your machine and workspace. Quick adjustments prevent most welding defects.
Essential Safety Tips
You must follow strict safety procedures when operating a fiber laser welding machine. These steps protect you and others in your workspace:
- Complete professional training before using the machine.
- Inspect for loose wires, leaks, or damaged parts before each session.
- Keep flammable materials and unauthorized people away from the welding area.
- Direct the laser beam only at the workpiece.
- Learn how to use emergency stop mechanisms.
- Install exhaust hoods or fume extractors to remove hazardous vapors.
- Display warning signs to prevent accidental entry.
- Store fire extinguishers nearby and remove flammable substances.
- Perform routine maintenance checks on all safety systems.
- Limit access to trained professionals.
You should also prevent common safety incidents. Inspect electrical wiring and grounding regularly. Use guards and safety interlocks to protect against moving parts. Wear hearing protection if noise levels are high. Install laser enclosures and fume extraction systems. Provide safety training and emergency drills for all operators.
Note: Pendstar Laser offers technical support and a community forum. You can access real-time help and share experiences with other users.
You have learned the essential steps to build your own fiber laser welding machine. You can achieve strong welds, save money, and customize your setup. Pendstar Laser provides support and documentation to guide you through each stage. Many users report impressive results:
| Key Benefits of DIY Fiber Laser Welding Machines |
|---|
| Faster welding rates |
| Cleaner welds with less waste |
| Reduced thermal distortion |
| Strong, deep welds on thick materials |
| Lower maintenance and operational costs |
Tip: Start your project today. You will enjoy the satisfaction and flexibility of a custom-built machine.
FAQ
How do you choose between water-cooled and air-cooled systems?
You should select water-cooled systems for high-power or long welding sessions. Air-cooled systems work best for portable setups or lighter tasks. Water cooling gives better temperature control. Air cooling offers easier maintenance.
What safety gear do you need for laser welding?
You must wear laser safety glasses, flame-resistant clothing, heat-resistant gloves, and a welding mask. Safety footwear and respirators protect you from burns and fumes. Always check your gear before starting.
Can you weld different metals with a fiber laser welding machine?
You can weld carbon steel, stainless steel, and aluminum. Adjust the laser power and speed for each material. Test settings on scrap pieces before starting your main project.
What should you do if the weld quality is poor?
Check the laser alignment and clean the optics. Adjust the power and speed settings. Inspect the wire feeder and shield gas supply. Use calibration tools to improve accuracy.
Where can you get help during assembly or troubleshooting?
You can contact Pendstar Laser’s technical support team. You may also join their online community forum to ask questions and share experiences with other users.